Phantomix / Knoppix Live CD - Dial-In Setup
Dial-In Setup - Step by Step
- Make sure that your modem is set up correctly.
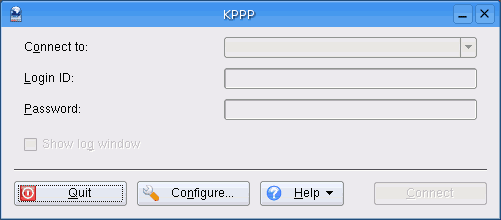
- Click on the penguin. A menu pops up. Click on Network/Internet, in the next menu click on Modem Dialer
- Click on Configure...
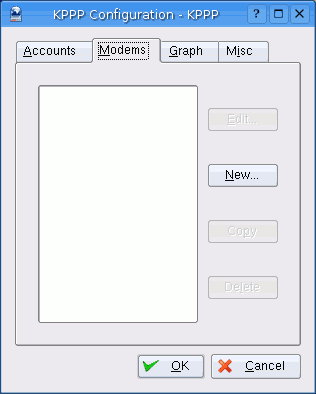
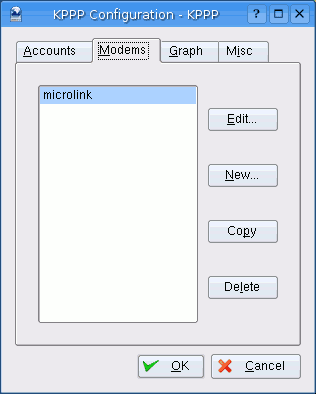
- Click on the Modems tab.
- Click on New...
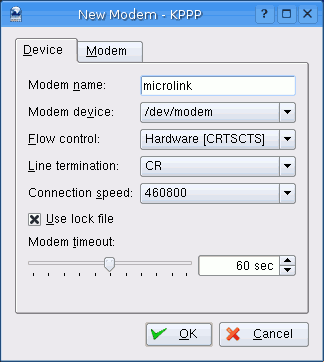
- In the field Modem name enter a name for your modem. Check the other settings. In some cases you may have to change Connection speed to a lower value like 115200 or less.
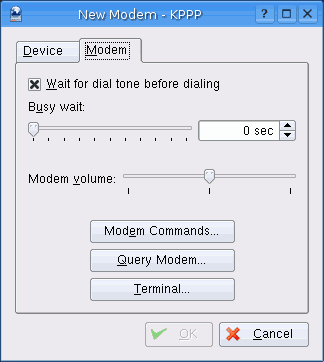
- Click on the Modem tab. To test your modem settings, click on Query Modem..."
- You should see a new window with the query results. Click on Close.
- Click on OK to close the modem window.
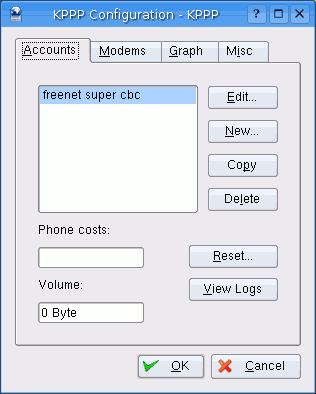
- Now your modem is listed in the Modems tab. Click on the Accounts tab.
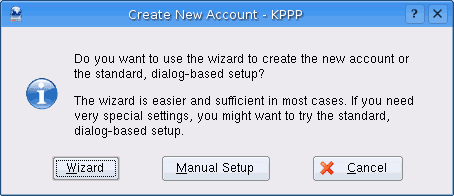
- In most cases you will have to choose Manual Setup.
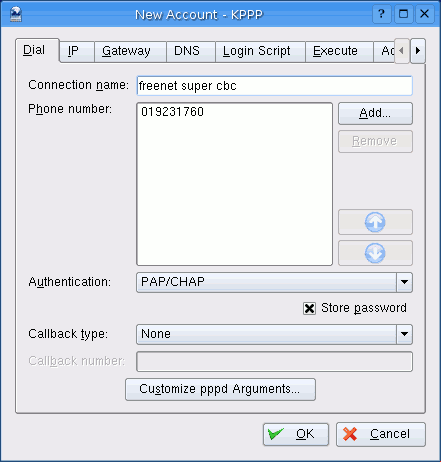
- Enter a name for your connection in the field Connection name. Then click on Add...
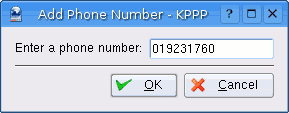
- Enter the phone number of the connection. Then click on OK.
- In most cases you will not have to change the other settings. Click on OK to close the window.
- Now your newly created account is listed in the Accounts tab. Click on OK to close the window. You can come back later to edit the account settings or enter a new one.
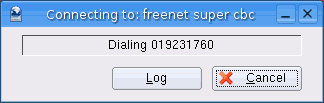
- Now your newly created account is displayed in the dial-in menu. Enter the Login ID (username) and Password from your internet provider. Then click on Connect to start dialing.
- A new window should have opened. Look at the displayed text to see what is happening. Check the number and listen to the sound of your modem.
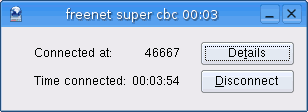
- If the window changes to this view, everything is ok. You are connected to the internet and can start surfing.


Last change: 2006-01-23